SEWapalooza!

I have been spending all of my free time sewing lately.

Some of my latest creations:

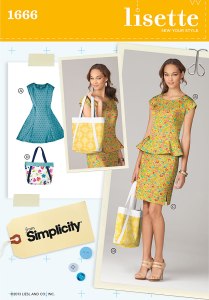
simplicity1666

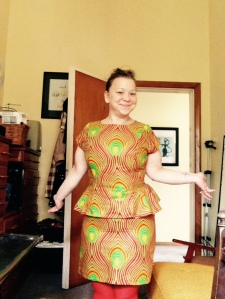
I used Simplicity 1666 to make a top and a skirt.  I liked how the top turned out but knew that I would need to make the skirt a bigger size. Unfortunately the way the patterns are sold the one I bought (6-14) does not have larger sizes… so I guessed and tried to cut it about a 16 or 18, and even so, the skirt was tiny and I fear I may bust a seam when sitting!

I used some fabric I ordered online from AliExpress that looked quite different on the computer than it did when it turned up… for a while I hated it but I decided I should try to make something with it, and actually I am loving the top. It’s pretty colourful but not too overwhelming when worn with black trousers or jeans.

Photo 25-11-14 11 55 12

There’s a fairly good description of the construction here.

I found that the zipper is probably unnecessary unless you are particularly big busted (and need to do some bust adjustments).  However this project did make me really appreciate the importance of stay-stitching, a step I usually skip.  Never again!  It really made the neckline turn out much nicer, and only takes a few minutes.

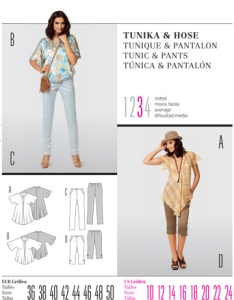
Once again I broke out the Burda 7486 and made some trousers-

7486_SB.indd

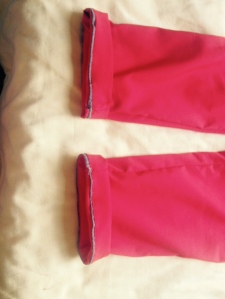
this time I ended up making 3 pairs – one in a black silk it the turned out also too small (curse my damn big booty!), one in rayon, and one in fluro orange with a slight stretch that I also added a fabulous reflective piping detail to when the cuff is turned up!

Photo 2-12-14 07 48 01

These are my new cycling trousers.

I’ll post more pictures when they come out of the wash.

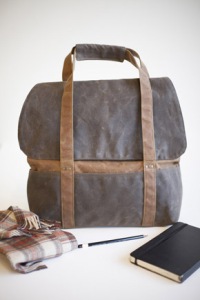
I also spent all day Sunday working on my first Colette pattern – The Cooper.   There’s a great sewalong for the Cooper, and a companion book that complements the pattern instructions.

cp2003-cooper-01-med-cddb1f9285b761a9e1f779d6dd14499f

This was particularly helpful for some of the more difficult aspects of this project.

The biggest challenge with this bag was finding all the supplies!  It took me a visit to Spotlight, and Made on Marion, and extensive internet searching to figure out what I needed and where to get it from!

I could not figure out what Jiffy Rivets were at Spotlight (they had all different sorts of eyelets and etc. but none of them looked right), and lobster clasps were $5 a pair!  I got a few d-rings (which later I discovered were cheaper at Made on Marion) and a magnet clasp (also $5 for 1!!) which they did not seem to have at Made on Marion.  The best option is probably to go to the Dump Shop (Trash Palace in Poriua or Second Treasures in Happy Valley) and buy a 2nd hand laptop bag for $3, and then you get 2 lobster clasps and 2 d-rings that can be recycled.

So… bad construction.  I also learnt quite a lot here.  For example – fusible interfacing will not fuse to waterproof synthetics!  I bought 1 metre of “waterproof canvas” from Spotlight, and also had a bit of vinyl lying around that I used to make the bag.  The interfacing would not fuse to either, and the “canvas” in particular has very little stiffness, so my bag is very floppy, which especially in the flap is annoying.

However, I discovered that this makes the bag easily tuck-awayable into my other pannier, so I can have it for an emergency pannier bag rather than always lugging around a 2nd pannier basket in case I decide I want to stop at the supermarket on the way home.

On a side note I am so sick of my workmates always commenting on how I look like a hobo with all my bags and gear… I keep trying to explain to them all I usually am carrying is my lunch and my gym gear but I like to have an extra bag in case case I want to do some grocery shopping on my way home… but they still act as if I am some crazy weirdo.  Please, just leave me alone workmates.

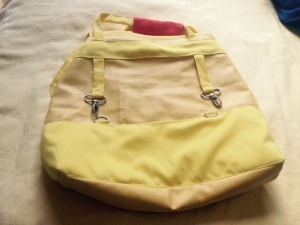
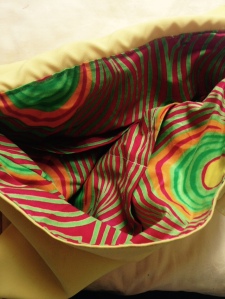
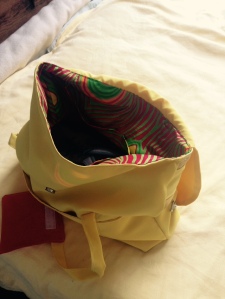
Anyway here is my finished Cooper, which I am happy with as a first go, but have some definite ideas about how to change it in a 2nd version.   Notice the lining is the same fabric as shown above for the Simplicity outfit.
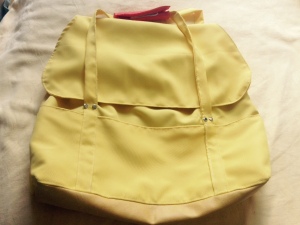
Cooper Front
Cooper Front
Cooper Back
Cooper Back
Cooper lining
Cooper lining
Cooper inside
Cooper insid

A few other comments about construction –

I am concerned about the durability of the bike-rack clasps here, because the straps attaching them to the bag are quite narrow in the pattern (25 mms), and short.  I don’t think as written this pattern could handle carrying a very heavy load.  if you are like me and you buy 2 kgs of chick peas and cheese by the block you really need a bag that can handle some weight.  So, for this version I increased the width of the fabric straps holding on the d-rings an the lobster clasps.  For a future creation I would also lengthen the d-ring attachment straps, making them go all the way to the bottom gusset seam, and possibly add some rivets to help secure them.

Also I like the modifications Squishy Lab made – adding a cross body strap and shortening the height.  Also the wool is beautiful! So, some inspiration of my future creations.
Wax prints pt. 2

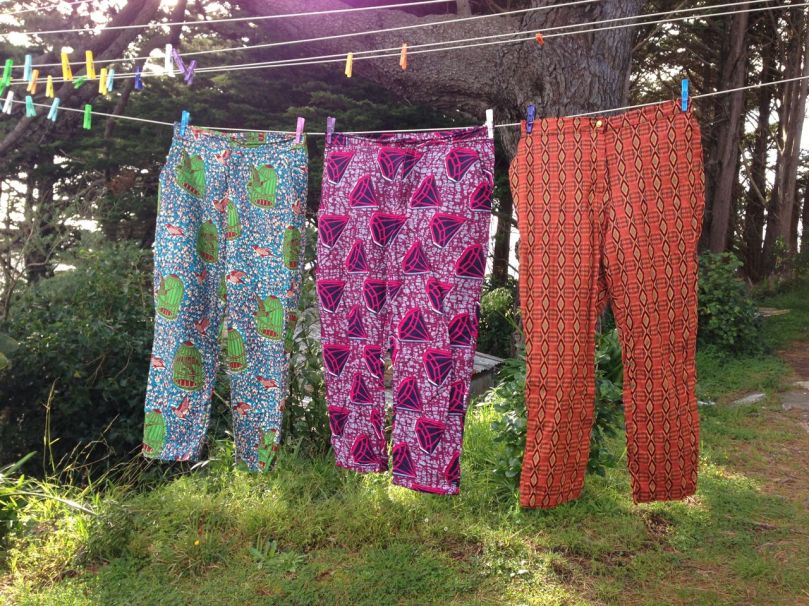
Here are some images of my latest sewing creations:

wax02My three pairs of trousers made from Burda 7486.  I have another pair in a black stretch denim as well.   I quite like this pattern.  From left to right:

Birds and birdcages

Diamonds (bling print)

The rightmost-print is not actually African wax – it’s just an ethnic-y style cotton print I got at a jumble sale.

Some other creations:

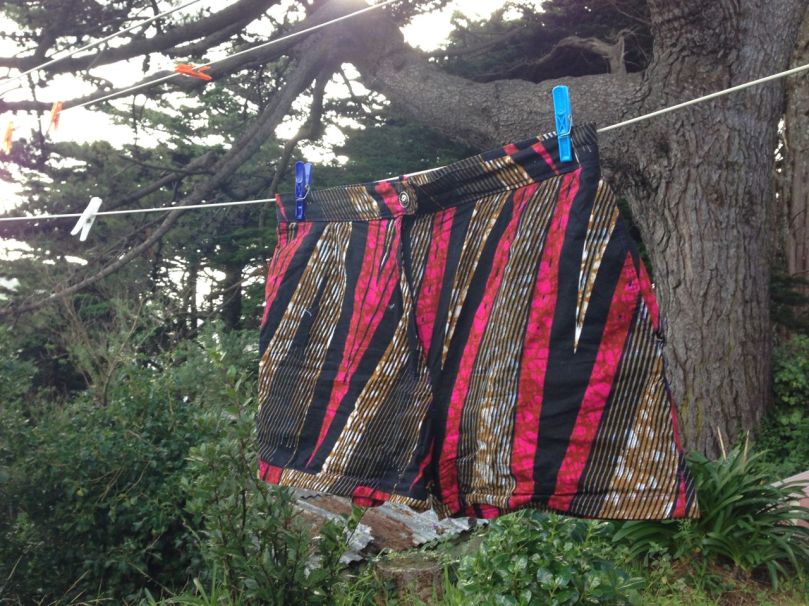
wax04Shorts, these are made from Vogue 2532.  Not my favourite pattern – the way the shorts are constructed with the pockets in the side seam means the pockets bulge out unattractively.  I have not re-used this pattern since.

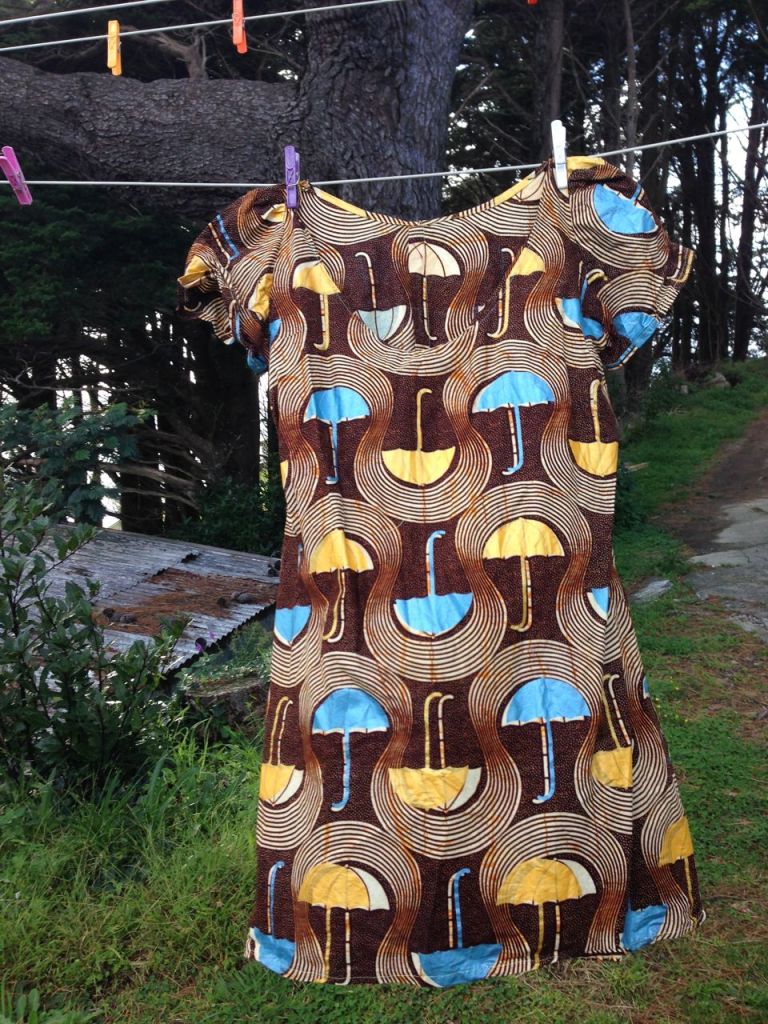
wax06This is a self drafted pattern, using this awesome umbrella print!  Unfortunately after sewing it together I realised that I have two big blue umbrellas right over my nipples.


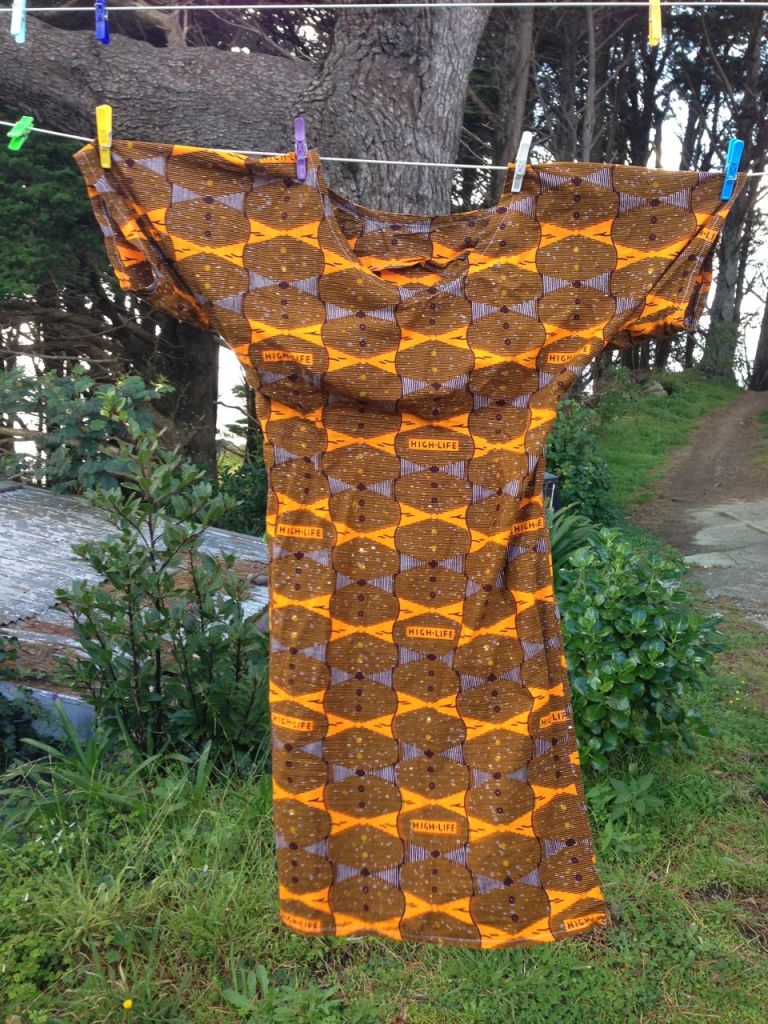
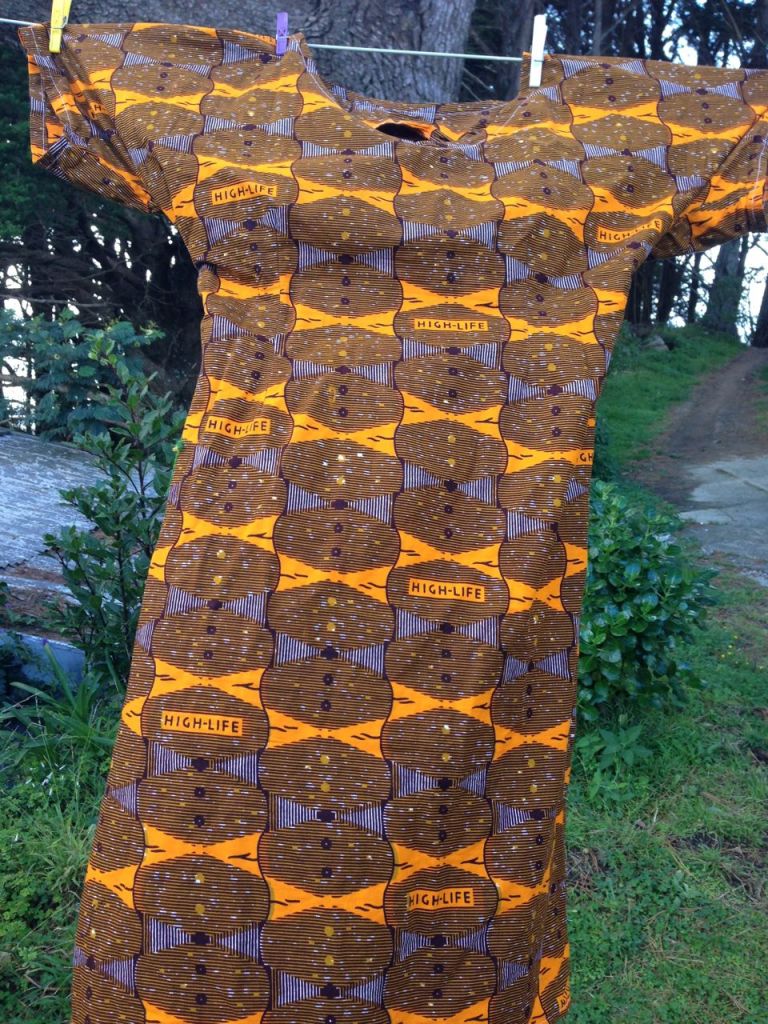
wax08wax09Here is another self-drafted dress.  This one is basically one large piece with kimono-style-ish wide sleeves.  It does have a slit along the side too so I can ride my bike in it.  I love this print and this dress – it’s probably not showcased very well here on the washing line but it’s very flattering and probably my favourite creation so far this year.

Well, until I finished my jacket:


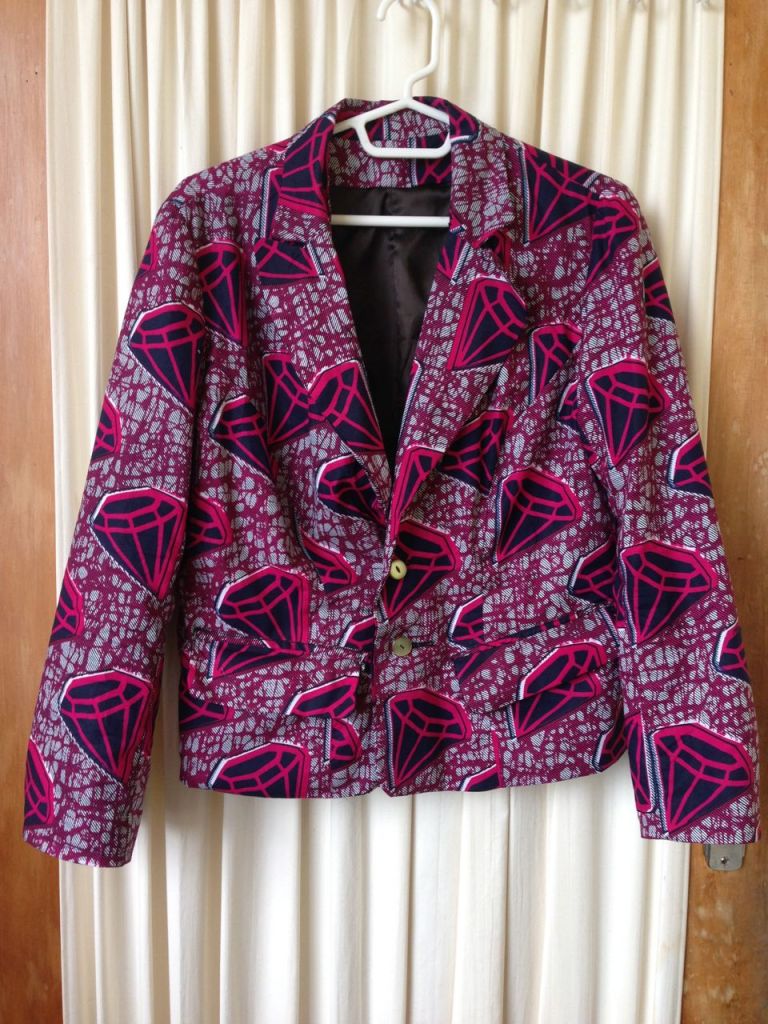
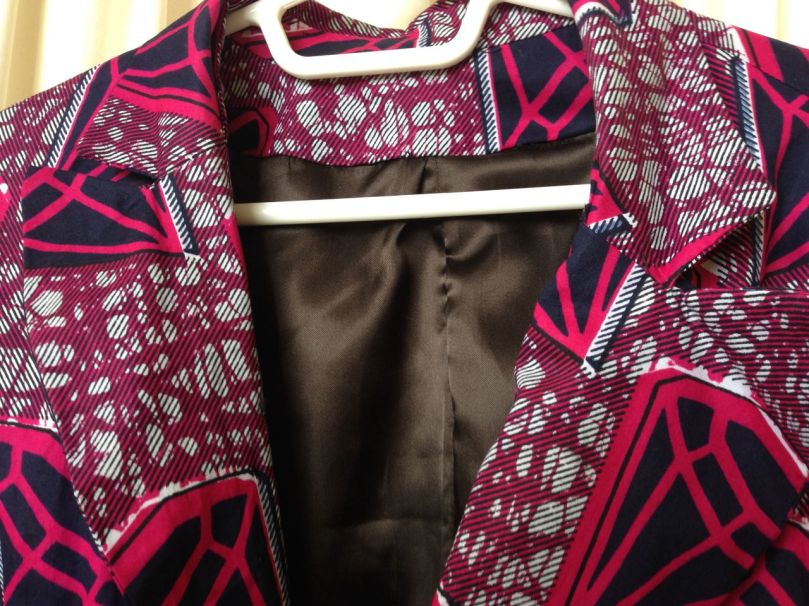
wax jacket1Yes, it is the same print as one of my pairs of trousers above.  I could wear an entire bling wax print suit! This was made using variation A of Burda 7135.

It took me about 18 hours to complete, and using a figure of $25 an hour as my typical hourly wage, plus materials, this jacket is worth about $500 NZD.   But I say it’s priceless!  Anyway I managed to learn a few new things while I was at it.  I’m planning to make another one soon – that way I will be able to practise the new skills again before I have forgotten them and hopefully get better at stuff like a notched collar and welt pockets.

wax12


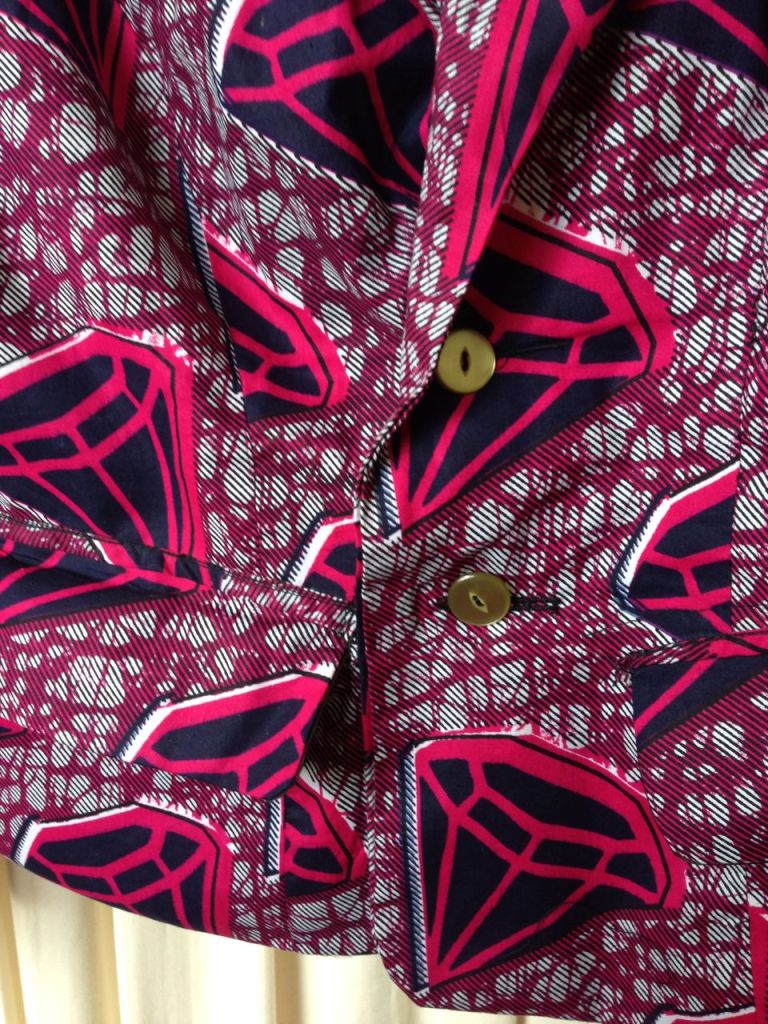
I put the buttonholes/buttons on the wrong side (it buttons like a man’s coat).  But they’re cute buttons right?!

wax14


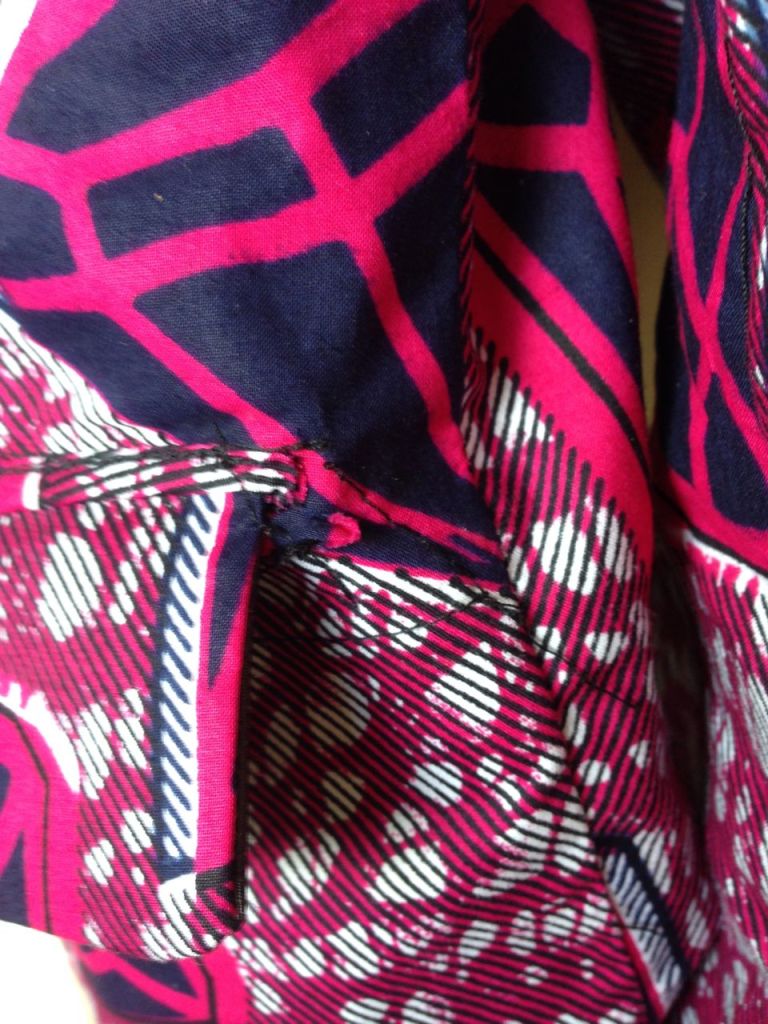
These pockets are a hot mess! wax15

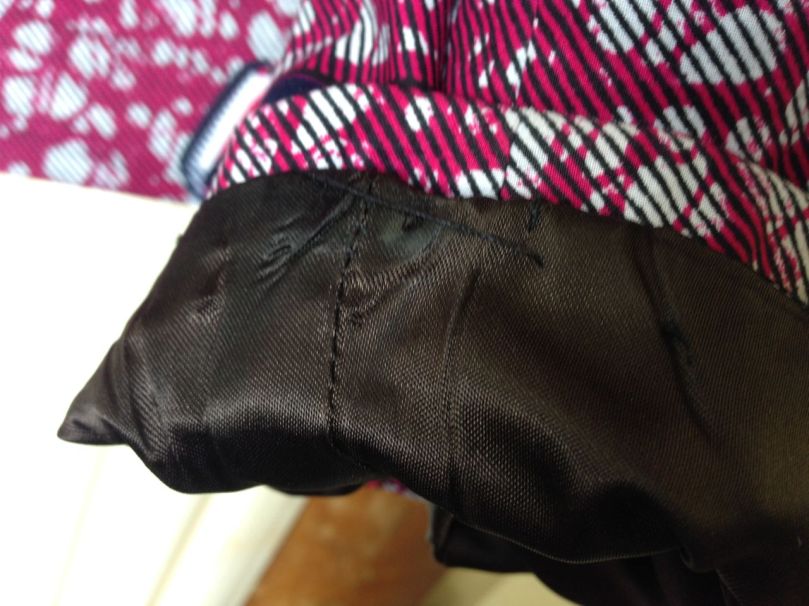
I managed to melt the acetate lining when ironing the sleeve cuff… also there’s supposed to be some kind of “vent” in the sleeve that I haven’t yet figured out how it’s supposed to work.

wax01

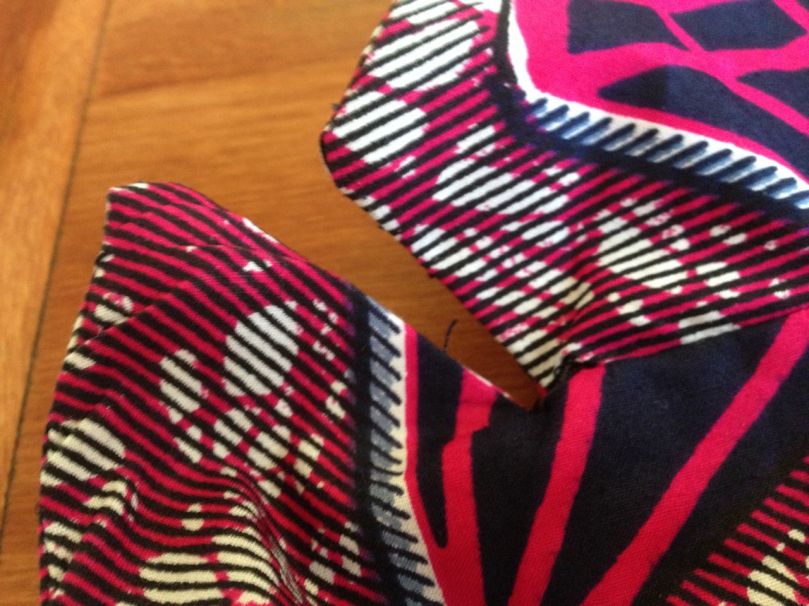
It may be hard to tell from this photo but my collar and lapels are really sloppy looking.  This is even after completely taking the entire collar apart and re-sewing all 8 pieces, clipping, trimming, etc. etc. very painstakingly and delicately! I still can’t figure out why it looks so sloppy – I tried really hard to line everything up neatly.  I think the problem is that I still haven’t figured out which seams cause which effects on the finished garment – and what needs to be lined up with what.  I’m a “global learner” according to some tests my students have to take, and I think that means if I can’t see the “big picture” I struggle.  So, hopefully doing a lapel and notched collar for a 3rd time (or maybe 4th if my next jacket needs it to be done twice like this one did) I will have a better idea of how it all works.

wax10


Also the collar is a bit floppy – I will definitely use some interfacing for some of the pieces in my next version.  I don’t know why the pattern itself doesn’t recommend interfacing those pieces?

Any, it looks fabulous regardless, and I am happy to wear it even if it is a  bit sloppy looking.  Luckily the print is so busy it’s hard to notice all the flaws!


Wax prints

Did you know that Easter is a really big deal here in New Zealand I had a mandatory 5 day holiday from work?

Also all the shops are closed on Good Friday & Easter Sunday (except in Wanaka, WTF?!).  I decided to have a sewing stay-cation, since we are going away in May anyway, and I really just wanted to have a nice, quiet, relaxing few days away from work.

On a side note, there’s been a lot of discussion about Easter trading laws here in New Zealand (you can get a haircut but not buy hairspray, you can drink a beer with your meal, but not buy a beer?) but the one thing no one seems to mention is the religious background of this holiday and it’s appropriateness for a multi-cultural society.  I don’t mind restrictions on trade – it’s nice to have a few days where shops must be shut, and I think the unions have been hugely influential and ensuring that workers have the right to time off on public holidays, which I applaud, but why does it have to be Christian doctrine dictating which days those are?

Why not have “Autumnal splendour day” or something instead of “Easter”?  Because, just in case you were not aware, it is not spring time here.

Anyway back to my sewing stay-cation:

Lately I am obsessed with West African wax prints, perhaps getting nostalgic for my days in Athieme, Benin?

I found a good supplier – Africanpremier.com, with some pretty amazing prints, like the ones below:

535018160_570

UT8qO9bXgVXXXagOFbXw


The minimum purchase is “une piece”, which is enough to make a “complet” (6 meters).  Some examples of fabulous African ladies in their “complet”:


Senegalese+daily+wear

As much as I would love to rock some serious African style here in Wellington, I prefer to mix and match my wax prints with typical Western-wear.

I have made about 4 pairs of trousers using  Burda 7486


7486_SB.indd

The top is hideous! But trousers version “C”  are great for making cotton pants with a zipper fly, so I don’t feel like a disgusting slob who wears elastic waist pants to work.  They have just enough ease for non-knit fabrics so you don’t feel like you are going to bust a seam but you have a skinny-leg style.  So far I have made 4 pairs of wax print trousers with this pattern – which are great with a solid colour shirt and even appropriate for the office.  That being said I am an academic so dress standards are fairly lose around my workplace.

(Photos coming soon)

I have also made a number of dresses – mostly not using any kind of pattern, but based on another dress I have.  However I did recently take a “make patterns from your existing wardrobe” course and have drafted a pattern for my new favourite simple shift dress.

(Photos coming soon)

Since I have so much wax print fabric at the moment I decided to be ambitious and try to make a blazer.  I had a black blazer that I loved ($10 from Ross on my last trip home!) but I managed to lose it (and my favourite green rain jacket) after not securing it properly to my bike rack on a nice sunny afternoon, somewhere between my office and the Waterloo station in Lower Hutt.

I reviewed a number of options but decided that princess seams would be the most flattering – so I picked Burda 7135:

7135

I’m went with version “A” – the shorter one, and didn’t realise I would be giving myself multiple headaches with all the new techniques I am trying to figure out with this one.

Burda Style has some good Blazer patterns – mostly sourced from the Burda Style Magazine, but they are only available as “print-at-home” patterns which I find to be a bit of a pain, so I went with what I could find at the shop.

Quite a challenging project, but hopefully will be worth the effort when finished.  It took me 3 hours just to lay out the pattern pieces and cut out the main fabric & lining.

My biggest difficulties thus far have been the welt pockets, the sleeves and the collar, all of which involve techniques new to me.

My welts look like a disaster, but luckily they are covered by these little pocket flaps so hopefully won’t mar the finished product.

The sleeves have been holding me up recently – I have never sewn anything with 2 sleeve pieces (the upper sleeve and an under-sleeve).  My pattern copying instructor said that having an under sleeve pattern piece cut on a different grain to the upper sleeve allows for more movement and ease – often used in jackets.  I finally figured out last night (after setting them in, thinking some thing was wrong, unpicking my sewing, swapping them around, then undoing it again thinking I had it right the first time) that I had sewn one of the sleeves inside out (it’s hard to tell with the print I am using) – so I had 2 left sleeves, hence all the confusion, and sewing/unpicking and thinking something was wrong.  So I have properly set in the sleeves as of this morning, and now the only thing left to do it put in the lining and hem it.

However, before I put the lining in, I need to fix the collar and lapels.  They are a hot mess!

I’m not crazy about the lower notched lapel extending more than the upper lapel (see image above).  But, it’s cut out and sewn up so I will leave it for the moment, and concentrate on getting them to look semi-good for the moment.  I think I need to re-sew some edged and clip some corners, maybe do some understitching which I have heard is helpful for collars.

I was really feeling like a sewing failure after all the sleeve issues, but I tried to remind myself this was a first for me, and a learning process.

Essentially this jacket, when finished, will end up being more of a muslin for me anyway, as I think I will need to make some serious sizing adjustments.  However, if the end result is a fabulously well-tailored, fitted blazer in an amazing beautiful African print, that is a one-of-a-kind awesome part of my wardrobe that I can wear to conferences and present papers in and feel like a sexy librarian academic superstar, then it will all be worth it!

Also I enjoy sewing, despite all the headaches it gives me!


How to make footless tights full length

I hate footless tights.  Why leave your poor little toes uncovered, cold, and bare?!  Unfortunately, many of the best patterns/colours of tights only seem to come in the footless variety.

I have developed a method for making them into regular tights.

As you can see, the foot on the left is cold and naked! On the other hand (or foot, as it were..) the foot on the right is warm and snugly covered.

Directions are below.

  • Step 1 – Select your tights.  Any denier/colour/pattern is fine, but buy 1 size up from the size you normally wear.  For example, I normally wear Average or Medium, but if it’s a pair of footless tights I want to turn into regular tights, I will buy “Tall” size.  Please note that this method does not work for “capri length” tights.
  • Step 2 – turn them inside out
  • Step 3 – Using a sewing machine,  start sewing from 1 corner to the other, as close as you can to the edges, using a stretch (zig-zag) stitch.  You could do this buy hand if you prefer.


Finally, you will have a toe that looks like this:

Voila!  Your tights now have feet!

more sewing adventures

I put away the chiffon for the time being and am instead trying to use up some my more wild prints.  The fabrics themselves inspired these two new dresses I made this week:

This print reminded me of something vaguely southwestern and Mexican.  So my first idea was a kind of poncho-like dress, but, that looked terrible on me, so I gathered the shoulders and put some pleats in the front and back at the waist, and voilà!  I didn’t use any kind of pattern for this dress… I just cut out a neck hole, sewed up the sides, and then added the pleats & gathers.

This print is so awesome and big and beautiful that I realised it needed to be showcased in a large format.  I haven’t really gotten on board with the maxi dress trend, though I do have one I bought in Laos that is a pretty Thai floral cotton print, but I usually just wear it for pyjamas.  However after watching Project Runway I decided I should go for a maxi with this amazing 70’s print.  I looked at a few tutorials, like Made By Lex’s Maxi Dress Tutorial, and the SoHo Maxi Dress tutorial and just started cutting.  I was limited by the amount of fabric I had… and the top turned out a bit skimpy, so I have to wear something under it if I want it to be office-appropriate, even with a cardigan.  Again, I didn’t use a pattern, but instead cut out the skirt based on my measurements, and then made 4 triangles for the top.  I used the twisty-strap idea from Lex’s tutorial, but did an empire waist rather than break up the print with a lower waist or waistband.  Both of these dresses came together in… under 2 or 3 hours each, and hopefully will get a lot of wear this summer! Unfortunately I still have a massive pile of fabric waiting to be turned into something fabulous, but, like my thesis, slowly and surely I am getting through it.

Also recently I knitted an iPod/iPhone cozy that I quite like.  In fact, I liked it so much, I knitted another one.  I may even start on a 3rd soon.

Even professional designers find working with chiffon difficult.

I saw it in Project Runway!  My guilty pleasure.  Anyway, that makes me feel a little better that my attempt to re-create the Robyn Mathieson dress has thus far been a total failure.

I’m also planning on re-creating this skirt from Trenery ($150 for a polyester skirt made in China!??! WTF?! ):

But think I need to first make myself a pleating board.  Luckily I had found 2 great tutorials on just how to do that.  One from Burda Style and one from Made by Lex.  They seem simple enough, I just need some poster board and a big ruler.  Then I will be able to make kilts and tons of other awesome pleated stuff!

I was thinking of checking out the Wellington Fashion Workshop  and maybe taking a class as they probably have a pleater board, and definitely overlockers and dress forms and real cutting tables, but as of yet I have not been.  That is also part of my strategic plan for the upcoming few months.  In the meantime I am continuing with my ukulele lessons (though rarely practising because I can’t tune the goddamn thing)  and other creative extracurriculars.

curses!

I have just spent the last 6 hours trying to recreate this $300 dress I fell in love with after spying it in a shop window last week.

I went into the shop and tried it on yesterday.  I thought to myself “Maybe if I don’t eat for the next 3 weeks…” but then I looked more closely.  It didn’t look that complicated to me.  Just a simple shift dress with some fancy details.   I thought “I could make this.”   So I went to the fabric store and got 3 meters of silk chiffon.

My attempt has thus far been an utter failure.

It may not be evident from this photo, but what are supposed to be straight geometric shapes, are completely crooked and look as if cut out and sewn by a 6 year old child.

Some reasons why:

  • Fuck!  Chiffon is hard to work with!!  And I have never tried to before.
  • I don’t have a dress form.
  • I don’t even have a cutting table.  My bed is my cutting table.  How am I supposed to cut a straight line with this flimsy fabric on a bed??!!
  • I am a very lazy and unskilled seamstress.
  • Also, my sewing machine sucks.

Anyway, there are numerous other reasons why this is not working out.  I am going to just take a break and step away from it for the rest of the day.  Maybe tomorrow I will be able to make something wearable out of this mess I have wasted 6 hours and $30 on.