My internal clock tells me that October is the autumn, and I should be eating pumpkins, cranberries, and baked apples. In New Zealand, it’s spring time, but I did some autumnal baking last week anyway. Me and my office mates ate everything too quickly to get any photos, but I have transcribed some of my recipes. Here they are for you to enjoy.
This has become my “go-to” muffin recipe. If I don’t have soymilk on hand, I use regular milk, which works fine. To make my autumn cranberry pumpkin muffins, I followed the recipe as written, however omitted the rolled oats and coconut, used 1 cup mashed pumpkin instead of banana, and added about 1/2 a cup frozen cranberries (you should probably cut the berries in half before adding them to the mix, though I was lazy and didn’t), and about 1/2 cup of dried cranberries.
Twice a year a group of government officials from Southeast Asia come to Wellington to study English for about 3 months with an NZAID/VUW scholarship. I have gotten involved in the programme as a “conversation buddy” to several students. I really enjoy meeting all the students, but of course, I have a special place in my heart for the ones from Laos!
The programme administrator normally organises about 4 or 5 different functions during each study term for the students and their conversation buddies. This includes 2 potluck dinners. The most recent potluck I attended I brought a large container of tofu laap and sticky rice. They were both gone within minutes. The Lao people were amazed and surprised that I had made the laap. Several of them said to me “You made this?! I thought it was a Lao person!”.
Most of the Lao people had never had tofu laap before. Usually laap is made with pork, chicken, or fish. Sometimes it’s made with raw water buffalo meat. However, some restaurants in Vientiane, mostly catering to tourists, do have tofu laap on their menus. So, that is where my inspiration for this dish came.
Cut up your tofu into very small cubes, about 1 or 2 cms in length. Heat your 4 tbs of oil and then gently fry the tofu. You want to cook it only lightly. Then, set it aside to cool.
Coarsely chop up your herbs, and mix them together with your fish sauce, lemon juice, chili, sticky rice powder, and ginger. Add the tofu and toss gently. Taste it and adjust the seasonings, adding more lemon juice,or fish sauce if needed. Serve right away or the herbs will start to wilt.
This dish is excellent with sticky rice, and should be served at room temperature.
The autumn harvest is upon us here in New Zealand. That means baby root vegetables, new season apples, and the end of summer fruits. As the last of the summer’s peaches, nectarines, apricots pears, and plums have been coming in, I have been bottling them for winter treats.
I also did a few jars of preserved lemons, after a preserving workshop at Moore Wilson’s, where that was the main recipe demonstrated.
In addition to bottling, I made a batch of pickled beets, and a few jars of lemon curd, which are long gone by now!
But, my most exciting (and tasty!) accomplishment on the home-preserving front thus far has been my fire roasted tomato and chipotle ketchup!
How did I do it?
Well, I started out by cobbling together my own home-made charcoal grill from bits of scavenged garden and kitchen supplies, including, an old terra cotta planter, a rusty brazier that has been holding a bucket of clothes pegs since we moved in, and the grill rack from the broiler (which clearly now needs a good clean).
homemade grill
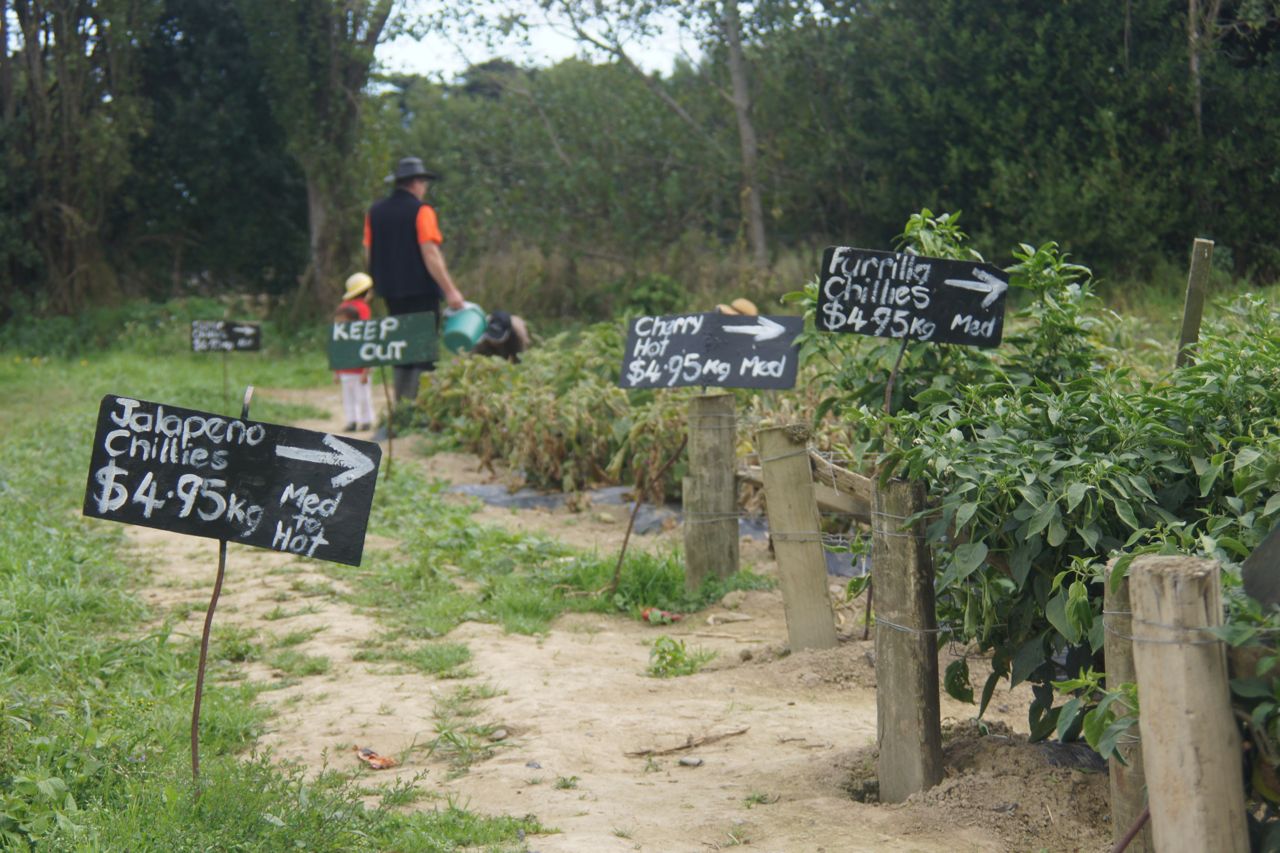
I threw some balsamic-marinated tomatoes on the grill, let them char a bit, and then peeled off the skins once they were cool. I also threw on a few jalapeno chilies I had picked last weekend at the chili pepper patch in Kapiti, and let those get nice and smoky for a few hours.
Once it had cooled a bit, I blended up one chili, one can of chopped tomatoes, about 1 cup of the fire roasted tomatoes, 1/2 a white onion, 1/4 cup cider vinegar, 2 tbs white sugar, 2 tbs brown sugar, some salt until it was fully pureed. I then added a few cloves and pepper corns, and let that mixture cook on a very very low heat semi-covered for about 3 hours. After it had thickened up and there was not too much liquid left in the pot, I took it off the heat and let it cool. It thickened up quite a bit after that, and I pushed the whole thing through a sieve, which was very messy and a lot of work. But the taste… was worth every minute of effort.
Below are some pictures from my trip to the chili pepper patch last weekend!
Just when you thought it was safe to put a teapot on the top of your kitchen cupboards…
a 4.5 magnitude earthquake shakes your kitchen!
Ok, not exactly. Yes, there was an earthquake in Wellington on Monday night. Yes it was 4.5 magnitude. Yes, a lot of people felt it.
No, I did not feel it, and no, it did not shake my teapots.
In fact, I probably would never have even known there had been an earthquake if Ticker hadn’t called me from work, where he informed me that the entire kitchen at Maria Pia’s (the establishment where he is employed) was shaking. Thanks to that call, I barely slept a wink all night.
Now… should I take the wine bottles and teapots down off the top of the cupboard?
Oh, in unrelated news, I also wanted to mention that I recently participated in Wellington’s “Round the Bays” 7-km fun-run, my first time ever participating in an organized sporting event. At a pretty slow jogging pace I completed the 7 km run in just under 52 minutes. I am certainly proud of myself. Will I go for a 10 km or half marathon next? Pretty unlikely. Running more than an hour is pretty boring. I’d rather stay at home and knit while watching Louis Theroux documentaries.
Speaking of knitting, I have been on a rampage lately! I finished a tea cozy last week, and am about 75% done with my first ever pair of mittens! I shall post pictures time permitting. I have also been doing quite a bit of sewing and baking, much to the detriment of my progress on my research. My most recent interest has been in savoury muffins. A sample recipe follows – spice it up with your own personalized additions!
2 cups flour
1 egg
1/4 cup oil
2/3 cup milk
2 tbs baking powder
1/2 cup grated cheese (colby or cheddar are nice)
1/4 cup toasted seeds (sunflower or pumpkin are nice)
1/4 cup chopped fresh herbs (I used parsley and sage)
a pinch of salt
pepper
2 tbs sweet chili sauce
1 tsp crushed dried hot chili flakes
mix and match your favorite savoury ingredients, including stuff like:
spring onions
walnuts
blue cheese bits
bacon
ham
olives
sauteed mushrooms
corn
fresh tomatoes
chopped spinach
goat cheese
a handful of chopped sundried tomatoes
1/2 an onion, finely sliced and carmelized
Whatever you throw in, don’t over do it, remember “less is more” when it comes to flavours, and just be careful not to overmix your batter, or the muffins will come out tough and rubbery. Mix everything together with a few swift strokes of a spoon or knife, until just combined, Spoon into greased muffin tins, sprinkle a bit more cheese on top, and bake at 375 F/180 C for 25 – 30 minutes or until golden brown.
They’re great on their own, or served with a nice bowl of soup.
So… my housemate has created an official Holloway Road Food Blog – that all of us can update. That means in the future I will be posting my culinary adventures on that site, rather than this one. Which leaves me to wonder – What will I put here?
Anyway, in the meantime, here are some pictures of my curry and curry paste, and the pumpkin cheesecake pie I made last night (with low-fat cream cheese!).
YUM!!!
yummy curryhome made curry pasteginger-pumpkin cheesecake pie!
and… I bought a sewing machine on trademe.co.nz! As soon as I go to Island Bay to pick it up I’ll get back to sewing! I can’t wait!
I also got some furniture at some second hand shops in Karori. Here in New Zealand resale shops, thrift shops, second hand stores, etc. are called “op shops”, which is short for “opportunity shop”. There are also a fair number of “vintage shops” on Cuba Street, which my housemate Emma calls “Op Shops”, and a number of overpriced junky “antique shops”, that she also calls “op shops”, though I would disagree. I tried to buy a small 2nd hand lamp from the guy in one shop – he wanted $15 for it!!! You can buy a NEW lamp for $15 at the warehouse. JESUS!!! The guy’s store was so crammed full of junk you could hardly walk. I wanted to buy a cute polka-dot tie, thinking it’s be a dollar or two. No – he asked for $10 !!!! I won’t be going back there again… except maybe to sell some junk when I move!
I taught my housemate’s younger sister Alex how to make black bean burritos on Friday. Her concept of burritos was very different from my own, but I educated her in the finer concepts of mexican cuisine, of course, the secret ingredient being CUMIN! (and love!)
black bean burritos
For the meal, I taught Alex how to make:
Salsa Fresca
Guacamole
Mexican Rice
Refried Beans
and Black bean filling!
I also made whole wheat tortillas the night before, though i don’t recommend it. Just buy them for $3 and save yourself 2 hours of work.
The basic recipe for the black bean filling is as follows:
2 cups dried black beans, soaked overnight & boiled for 1 hour in salted water.
Drain the beans, reserving 1 cup liquid.
Sautee 3 cloves of garlic, 1/2 an onion in 2 tbs or so oil for 2 or 3 minutes.
Add the beans, plus the 1 cup liquid, plus 2 tbs of cumin powder, plus salt & pepper, and chili to your taste. Let cook uncovered about 5 or 10 minutes, until liquid is mostly gone. Season to taste with more cumin, salt, pepper, or chili.
Dead easy!
Last time I made these burritos, I also made a sweet-potato apple puree that was inspired by Burritoville.
To make that, I basically boiled up a sweet potato and an apple chopped up, drained it, then mashed them, with some cumin, salt, pepper, and a bit of cinnamon! YUM!
Me & my sous-chef
I like being a cooking instructor!
(That ugly red mark on my neck/chest are the remnants of the worst sunburn I have ever gotten my first Sunday in Wellington.)
My housemate & I have discussed starting a bit of a Holloway Road food blog – since we’re always eating the most delicious meals. I live in a house of 4 awesome chefs!
My goal for the next 5 weeks, before I leave Montreal on March 3rd, is to eat all of the dried beans I have in my cupboard. This includes large quantities of:
Black beans
Pinto beans
Navy beans
Kidney Beans
Split peas
Brown Lentils
Red Lentils
Chick peas
And a few cans of other types of beans. This is indeed a daunting task – how many beans can 1 girl eat, or feed to her friends?
Some recipes I’ve used/invented/modified to use these beans include:
Soak them in water for a few hours before you want to cook them. Alton Brown says to use cold water and let them sit for 8 hours. This apparently makes the beans more tender or delicious or something. If you have a life and don’t plan out your meals a week in advance, you can just add boiling water to your beans and let them soak for 1 hour. Throw in some salt or stock to make them yummier.
After they have soaked a bit you boil them with enough water (and salt or stock) to make sure they are completely submerged for about 1 hour.
Keep the heat low and check on them every once in a while to make sure the beans aren’t sticking to the bottom of the pot and the liquid hasn’t all evaporated.
Lentils and black eyed peas don’t really need to soak and don’t need to cook as long.
Just taste your beans to see if they are soft enough.
If you want to make hummus with chick peas, you really have to boil the sh*t out of them until they are very soft and mushy.
Apparently the water the you boil kidney beans in is poisonous or gives you stomach cramps or something, so you should soak them, drain them, and then boil them in fresh water, and then be sure to cook them thoroughly, and then completely drain them and rinse them before serving them in something like a salad.
I welcome recipes that will help me use these beans!
I have to admit, eating all these beans has had some negative consequences… they don’t call me “Gassy Gaston” for nothing!
Yes! I know it’s been ages since I wrote anything here. I’m getting into the routine of my job and life, and haven’t been up to much blog-worthy exciting stuff. One of my main focuses lately has been cooking and baking.
A recent big success was a Moroccan “Harira”, or chick-pea soup that I made. It got rave reviews and recipe requests from several people. Here is the recipe, that I modified from epicurious.com:
1 1/2 cups dried chickpeas
8 cups water + 2 chicken or vegetable bullion cubes
1 can diced tomatoes, plus a few fresh ones
1 large onion, finely chopped
1 small celery rib (including leaves), finely chopped (if you have one..)
3 tablespoons unsalted butter (or olive oil)
1 teaspoon turmeric
1 teaspoon black pepper
1 tsp teaspoon cinnamon
1/2 tsp chili flakes
2/3 cup chopped fresh cilantro
1 cup lentils ( I like brown or green, but red work too!)
1/2 cup grain or starch of your choice (quinoa is great! orzo, barley, cous cous, bulgar, white or brown rice are all also acceptable)
Chopped vegetables per your liking (zucchini, carrot, etc. – I wouldn’t use potato or any starchy vegetable; the chick peas, lentils, and quinoa are more than enough)
1/2 cup chopped fresh parsley
Prepare chickpeas:
Soak chickpeas in water to cover by 2 inches 8 to 12 hours with 1 bullion cube, or quick soak (bring to a boil, turn off, let sit 1 hour)
Drain chickpeas and rinse well. Transfer to a large saucepan and add 8 cups water + 1 bullion cube. Bring to a boil, then reduce heat and simmer, uncovered, until tender, 1 1/4 to 1 1/2 hours.
Coarsely purée tomatoes in a food processor.
Cook onion and celery in butter in a 4-quart heavy pot over moderately low heat, stirring occasionally, until softened. Add turmeric, pepper, chili and cinnamon and cook, stirring, 3 minutes. (I think I also threw in a few cumin seeds at this point. Coriander seeds would be good too!) feel free to modify how much spice you use based on your liking. The most spices, the better flavour.
Stir in tomato purée, 1/3 cup cilantro, chickpeas and lentils. Bring to a boil, then reduce heat and simmer, uncovered, until lentils are tender, about 35 minutes.
Stir in quinoa and optional vegetables and cook, stirring occasional, until tender, about 8 minutes. Stir in parsley, remaining 1/3 cup cilantro, and salt to taste.
Enjoy with my cous cous salad –
1 cup dry cous cous, cooked with 1/2 cup water, 1/2 cup stock
mixed veggies (zucchini, broccoli, onion, carrot, green & red pepper sauteed in olive oil & garlic or grilled; diced tomato & cucumber, chopped olives. Be careful not to overcook your veggies, keep them crispy!)
lemon juice
chili flakes
salt & pepper
fresh mint, chopped
fresh or dried parsley
Mix it all together… eat it hot or cold! Great lunch to bring to work.
Alana invited me over for dinner last week, and casually mentioned “I did make some bread today…”. Her secret – Artisan Bread in 5 minutes a Day!
I can’t afford to buy the book, but I found a recipe online. It’s not the same as what Alana served me (yummy whole wheat & rye !) but turned out better than any bread I’ve ever tried baking before!
Artisan Bread (in Five Minutes)
So this recipe has been floating around for a long time, gracing the blogs and the tables of many a foodie. Personally, I was a bit skeptical. I mean, what is the point of making bread if you aren’t going to knead it, fuss over it, watch it rise, punch it around… Making homemade bread is about technique, timing, and experience. Naturally, it comes with some bragging rights. But this bread changes everything. Anyone who can use a wooden spoon can make it. It’s simplicity makes it such that absolutely everyone has the ability to make gorgeous loaves of crusty outered, tender innard-ed bread.
To make the dough, you mix everything in a bowl. That’s it. The initial rise takes two or more hours. But this rise doesn’t need to be babysat, as you let it grow until it collapses in on itself. Then you take the resulting gloriously yeasty, puffy pile of dough, stick it in a tub, pop it in the fridge, and saw off a hunk whenever you have a hankering for fresh, warm bread. Nothing to it.
The longer the bread stays in your fridge (up to about two weeks), the more flavourful it becomes and the larger the air holes will be. Others have said that it improves greatly by keeping it in the fridge for just 24 hours, and that the longer it is in there, the better it will be. I personally thought it was scrumptious the very first day, and with my patience deficiency, there was no way in heck it was going to last more than a few days.
The “five minutes a day” thing really only refers to the active time once the dough is prepared (i.e. cutting off a chunk, flouring it, and slashing it). It takes a bit more than five to mix up the initial batch – maybe five-and-a-half, six minutes? Then on the day you bake it, it needs to rest for at least 40 minutes once it is shaped. Plus about a half-hour in the oven. But no time will be spent grunting and fretting as you might do when making bread the traditional way…. which you may never do again, once you try making it this way!
6 1/2 cups unbleached, all-purpose flour, more for dusting dough (*you can replace about 1 to 1 1/2 cups of white flour with any whole grain flour with great results).
Cornmeal
1. In a large bowl, mix yeast and salt into 3 cups warm water. Add flour, and stir to combine completely. Let dough rise in a warm place for at least two hours, until it rises and collapses (up to 5 hours – or even overnight won’t hurt it). The dough may be baked at this point, or refrigerated for later use.
2. Cover dough, but make sure it is not airtight – gases need to escape – and place in fridge. When you are ready to use it, throw a small fistful of flour on the surface and use a serrated knife to cut off a piece of the size you desire. (The authors recommend a 1 pound loaf – which means cutting off grapefruit-sized piece of dough). Turning the dough in your hands, stretch the surface of the dough and tuck in under. The surface will be smooth, and the bottom with be bunched.
3. Dust a pizza peel (or any flat surface – I use a rimless cookie sheet) with cornmeal. (This prevents sticking, and adds a nice, rustic crunch. You can use flour instead, but you’ll need to use a very generous dusting). Allow dough to rest in a warm place for 40 minutes – longer (up to an hour and a half) if you use some whole wheat flour in place of the white, or if you make a larger loaf.
4. Twenty minutes before baking, preheat oven to 450 degrees with baking stone (or overturned baking sheet) inside on the middle rack, plus a shallow pan on the top rack. Throw a small fistful of flour over the dough, slash it 2-4 times with a serrated knife (in a cross, a tic-tac-toe, or a fan), and slide it into the oven, onto the baking stone. Throw 1-2 cups of tap water into the shallow pan, and quickly shut the oven door to trap steam inside. Bake for 30 minutes, or until crust is well browned and bread sounds hollow when you knock on the bottom.
I’m happy to post recipes and other cooking info in this holiday feeding-frenzy period. If I happen to do anything noteworthy or exciting, I’ll also post about that.
Sticky Rice is an essential component of the Lao diet. It’s actually a different variety or rice and must be cooked in a different way than regular rice. Usually in a Lao home there will be a large basket full of sticky rice at any moment. The rice will be put to soak the night before, and then in the morning somebody (usually the wife.. or one of the daughters) will steam it. Lao people are convinced sticky rice tastes better if steamed over a charcoal fire. After the rice has been steamed and cooled a little, it is then put into the basket, or baskets. Most Lao people take a basket of rice like this with them for lunch when they leave the house in the morning, whether they are going to the rice paddy or to take care of the buffalo, or to the office. The rice stays fresh in the basket all day, and if there is some left over, you can re-steam it for a few minutes the following morning to freshen it up.
Lao people have a lot of sayings about sticky rice. They say it makes you stick to the ground, that’s why Lao people are short. They also say it makes you fat, and so you shouldn’t eat it at night. Sticky rice is really filling, and keeps you feeling full all day. I’m not sure where it is on the glycemic index, but I think it might be high.
Anyway, here is my recipe for sticky rice.
Firstly, you have to be sure to buy “Glutinous Rice”. This will usually be imported from Thailand if bought outside of Asia. Look for the keywords “Sticky Rice”, “Glutinous Rice”, or “Sweet Rice” on the bag. The rice grains are generally more opaque than ordinary rice and can be short or long.
Soak the rice in water at least 3 hours.
sticky rice soaking
You will need a tall pot to steam the rice. In Thailand and Laos there are special narow-necked pots that are used to steam the rice, but if you can’t find one, any tall pot will do.
cooking sticky rice
The essential component of making sticky rice successfully is that you have some kind of steaming basket (either wooden or metal, don’t use a plastic colander!) that is suspended OVER, not in, boiling water. Also, there should be some kind of seal around the basket, so that when the water boils, instead of escaping through a hole, most of it should be directed under and into the basket of rice. The rice/basket CANNOT be touching the water! Your rice will turn out like gooey slop.
Bring water to a boil in a pot, and steam the rice for about 15 or 20 minutes, covered. You can occasionally (2 or 3 times during the cooking process) shake the rice around to ensure even cooking. Cover it with a pot’s lid or another basket.
steaming the rice
After 15 minutes, taste some to see if it’s fully cooked. Be careful of over cooking, the rice will become gooey.
When it’s done, put it in a basket as shown, or another almost-air tight container. It can be kept unrefrigerated for about 24 hours. Steam it for a few moments to refreshen it if you want to eat leftovers and enjoy your delicious khao niao!